 Tendrl
Quick Start
Get up and running with Tendrl in just a few minutes.
Prerequisites#
- A Tendrl account (sign up at tendrl.com)
- Basic understanding of IoT concepts
Step 1: Create Your First Entity#
Entities represent devices, sensors, or any data source in your system.
- Navigate to Entities in the sidebar
- Click Create Entity
- Fill in the entity details:
- Name: A unique identifier (e.g.,
temperature-sensor-01) - Role: Controls what the entity can do.
DefaultEntityis fine for sending messages - Service / Enabled: Optional. A service applies validation rules to the entity's messages; entities are enabled by default
When you create the entity, Contact automatically issues an API key bound to it.
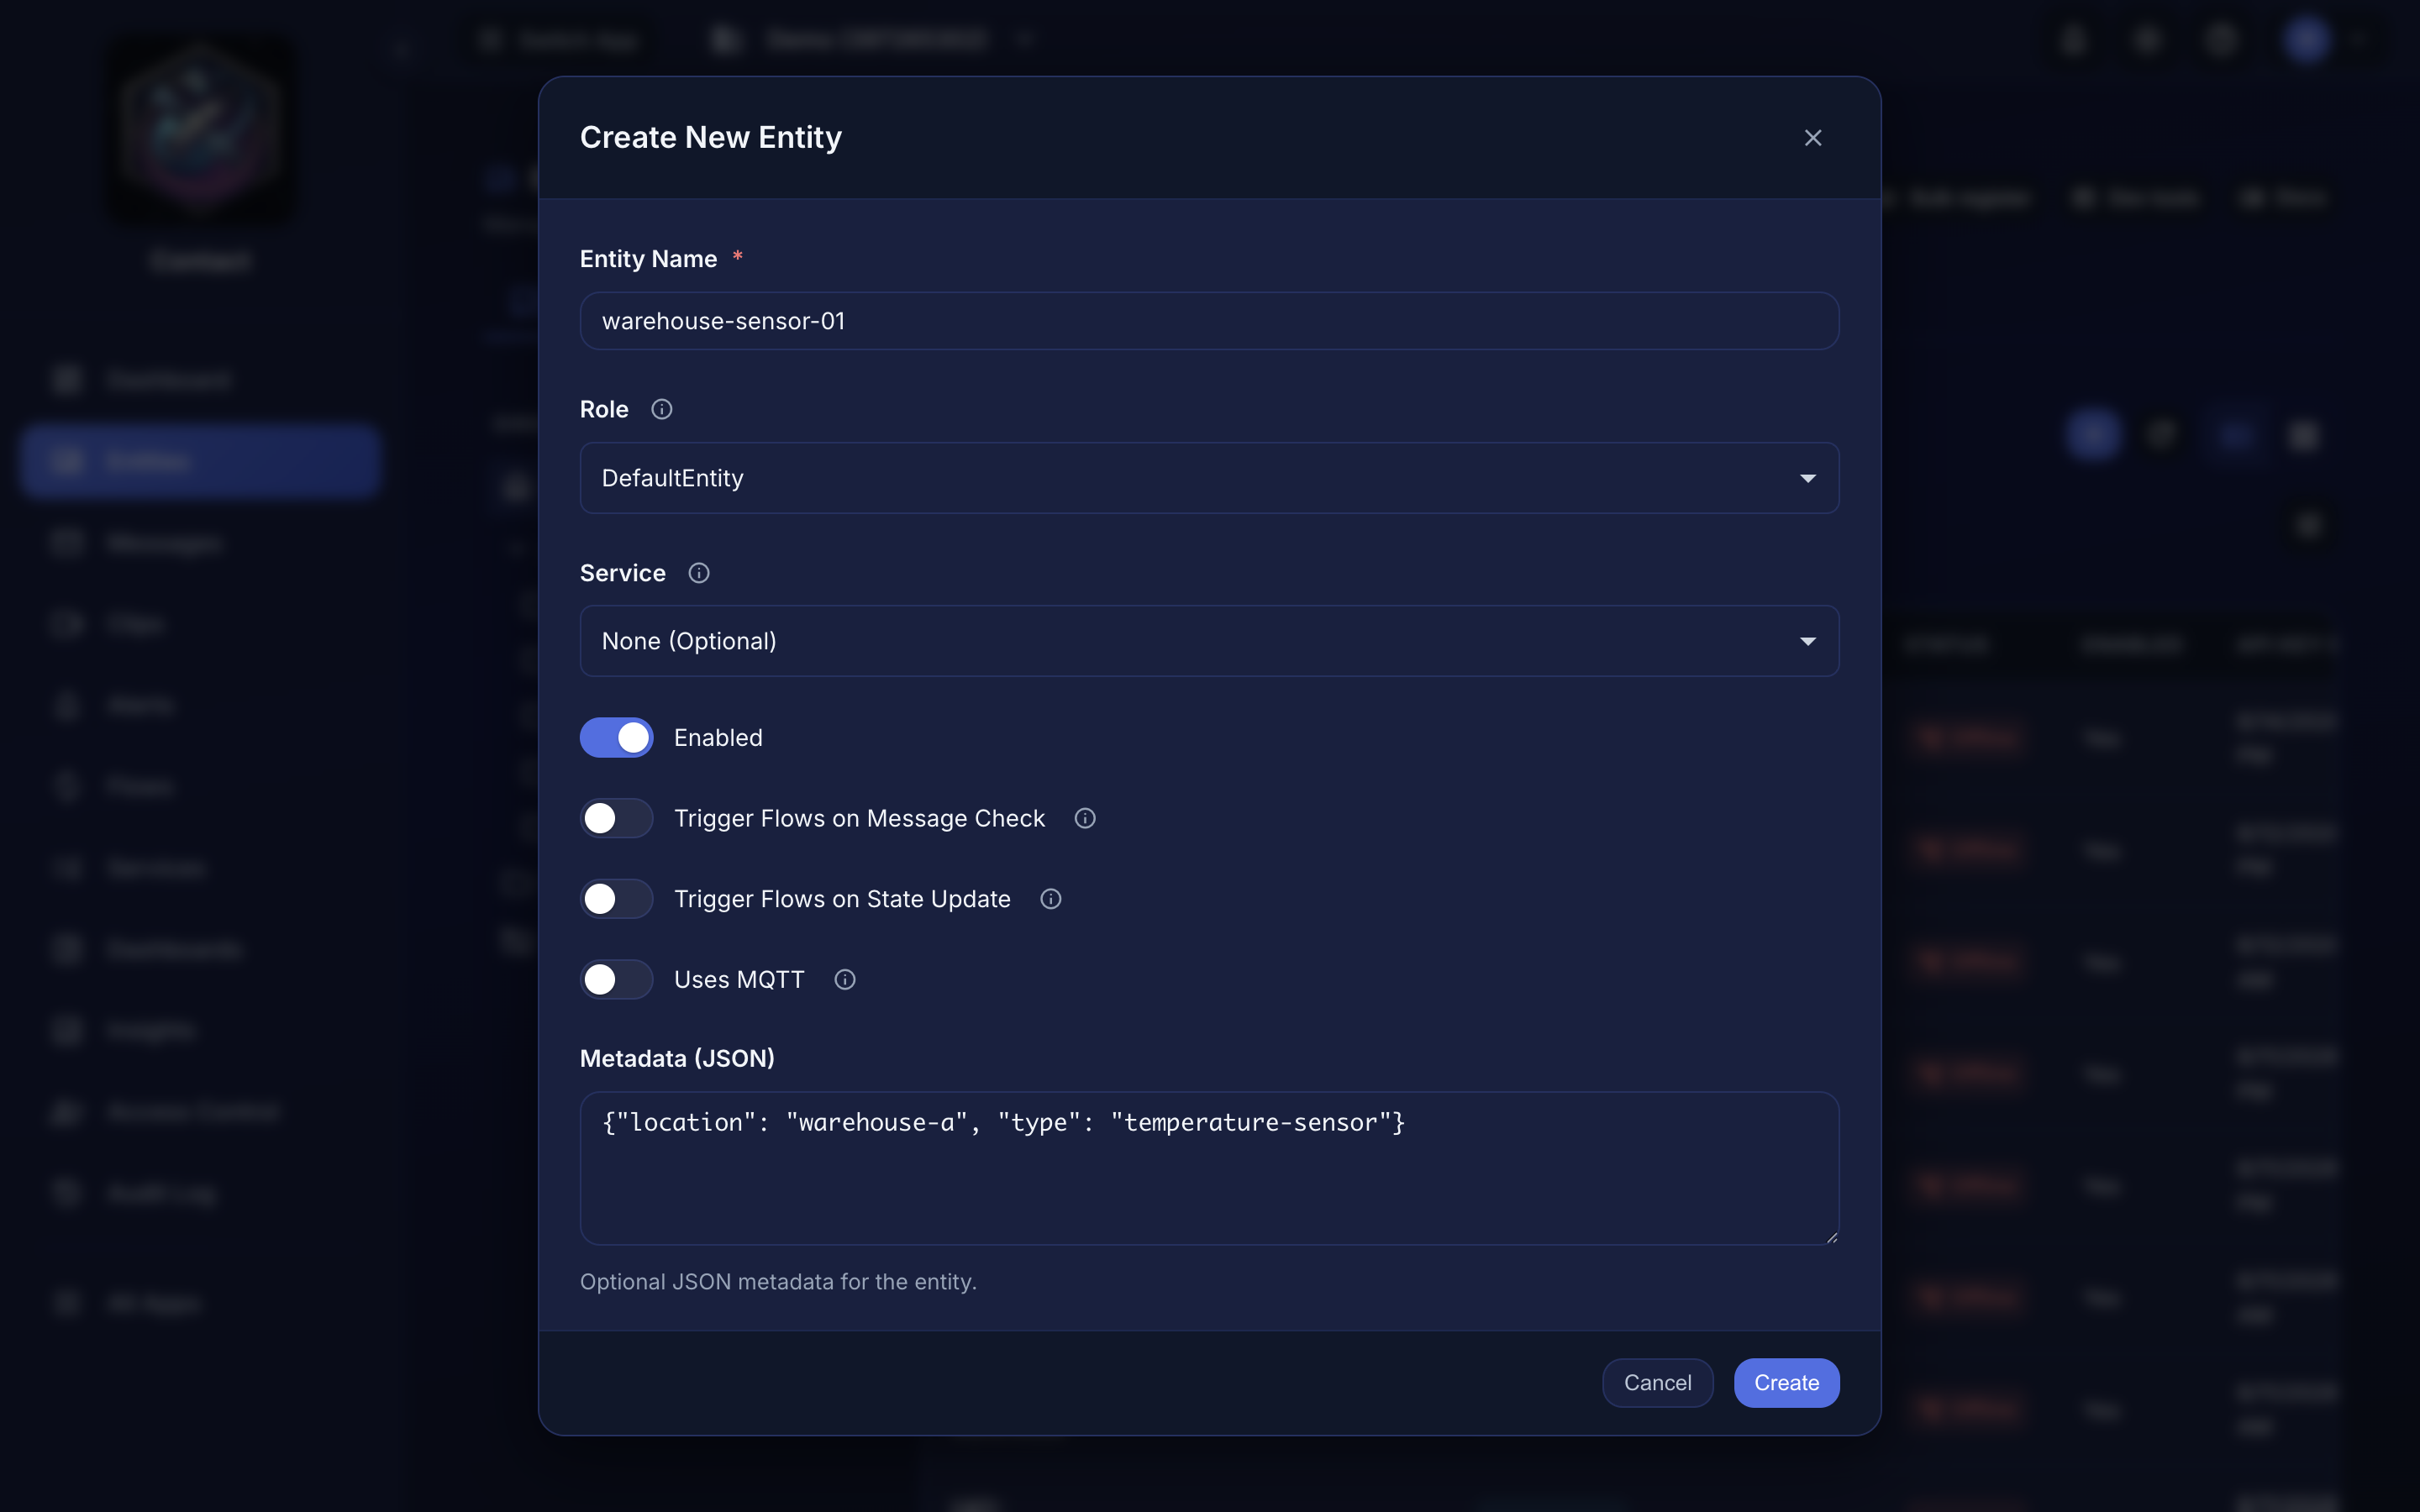 Creating an entity from the dashboard.
Step 2: Get Your API Key#
Contact shows the Connection Instructions dialog as soon as the entity is created:
- Reveal the API Key Secret with the eye icon, or use the copy button
- Store it somewhere safe; it's the token you'll send as
Bearer
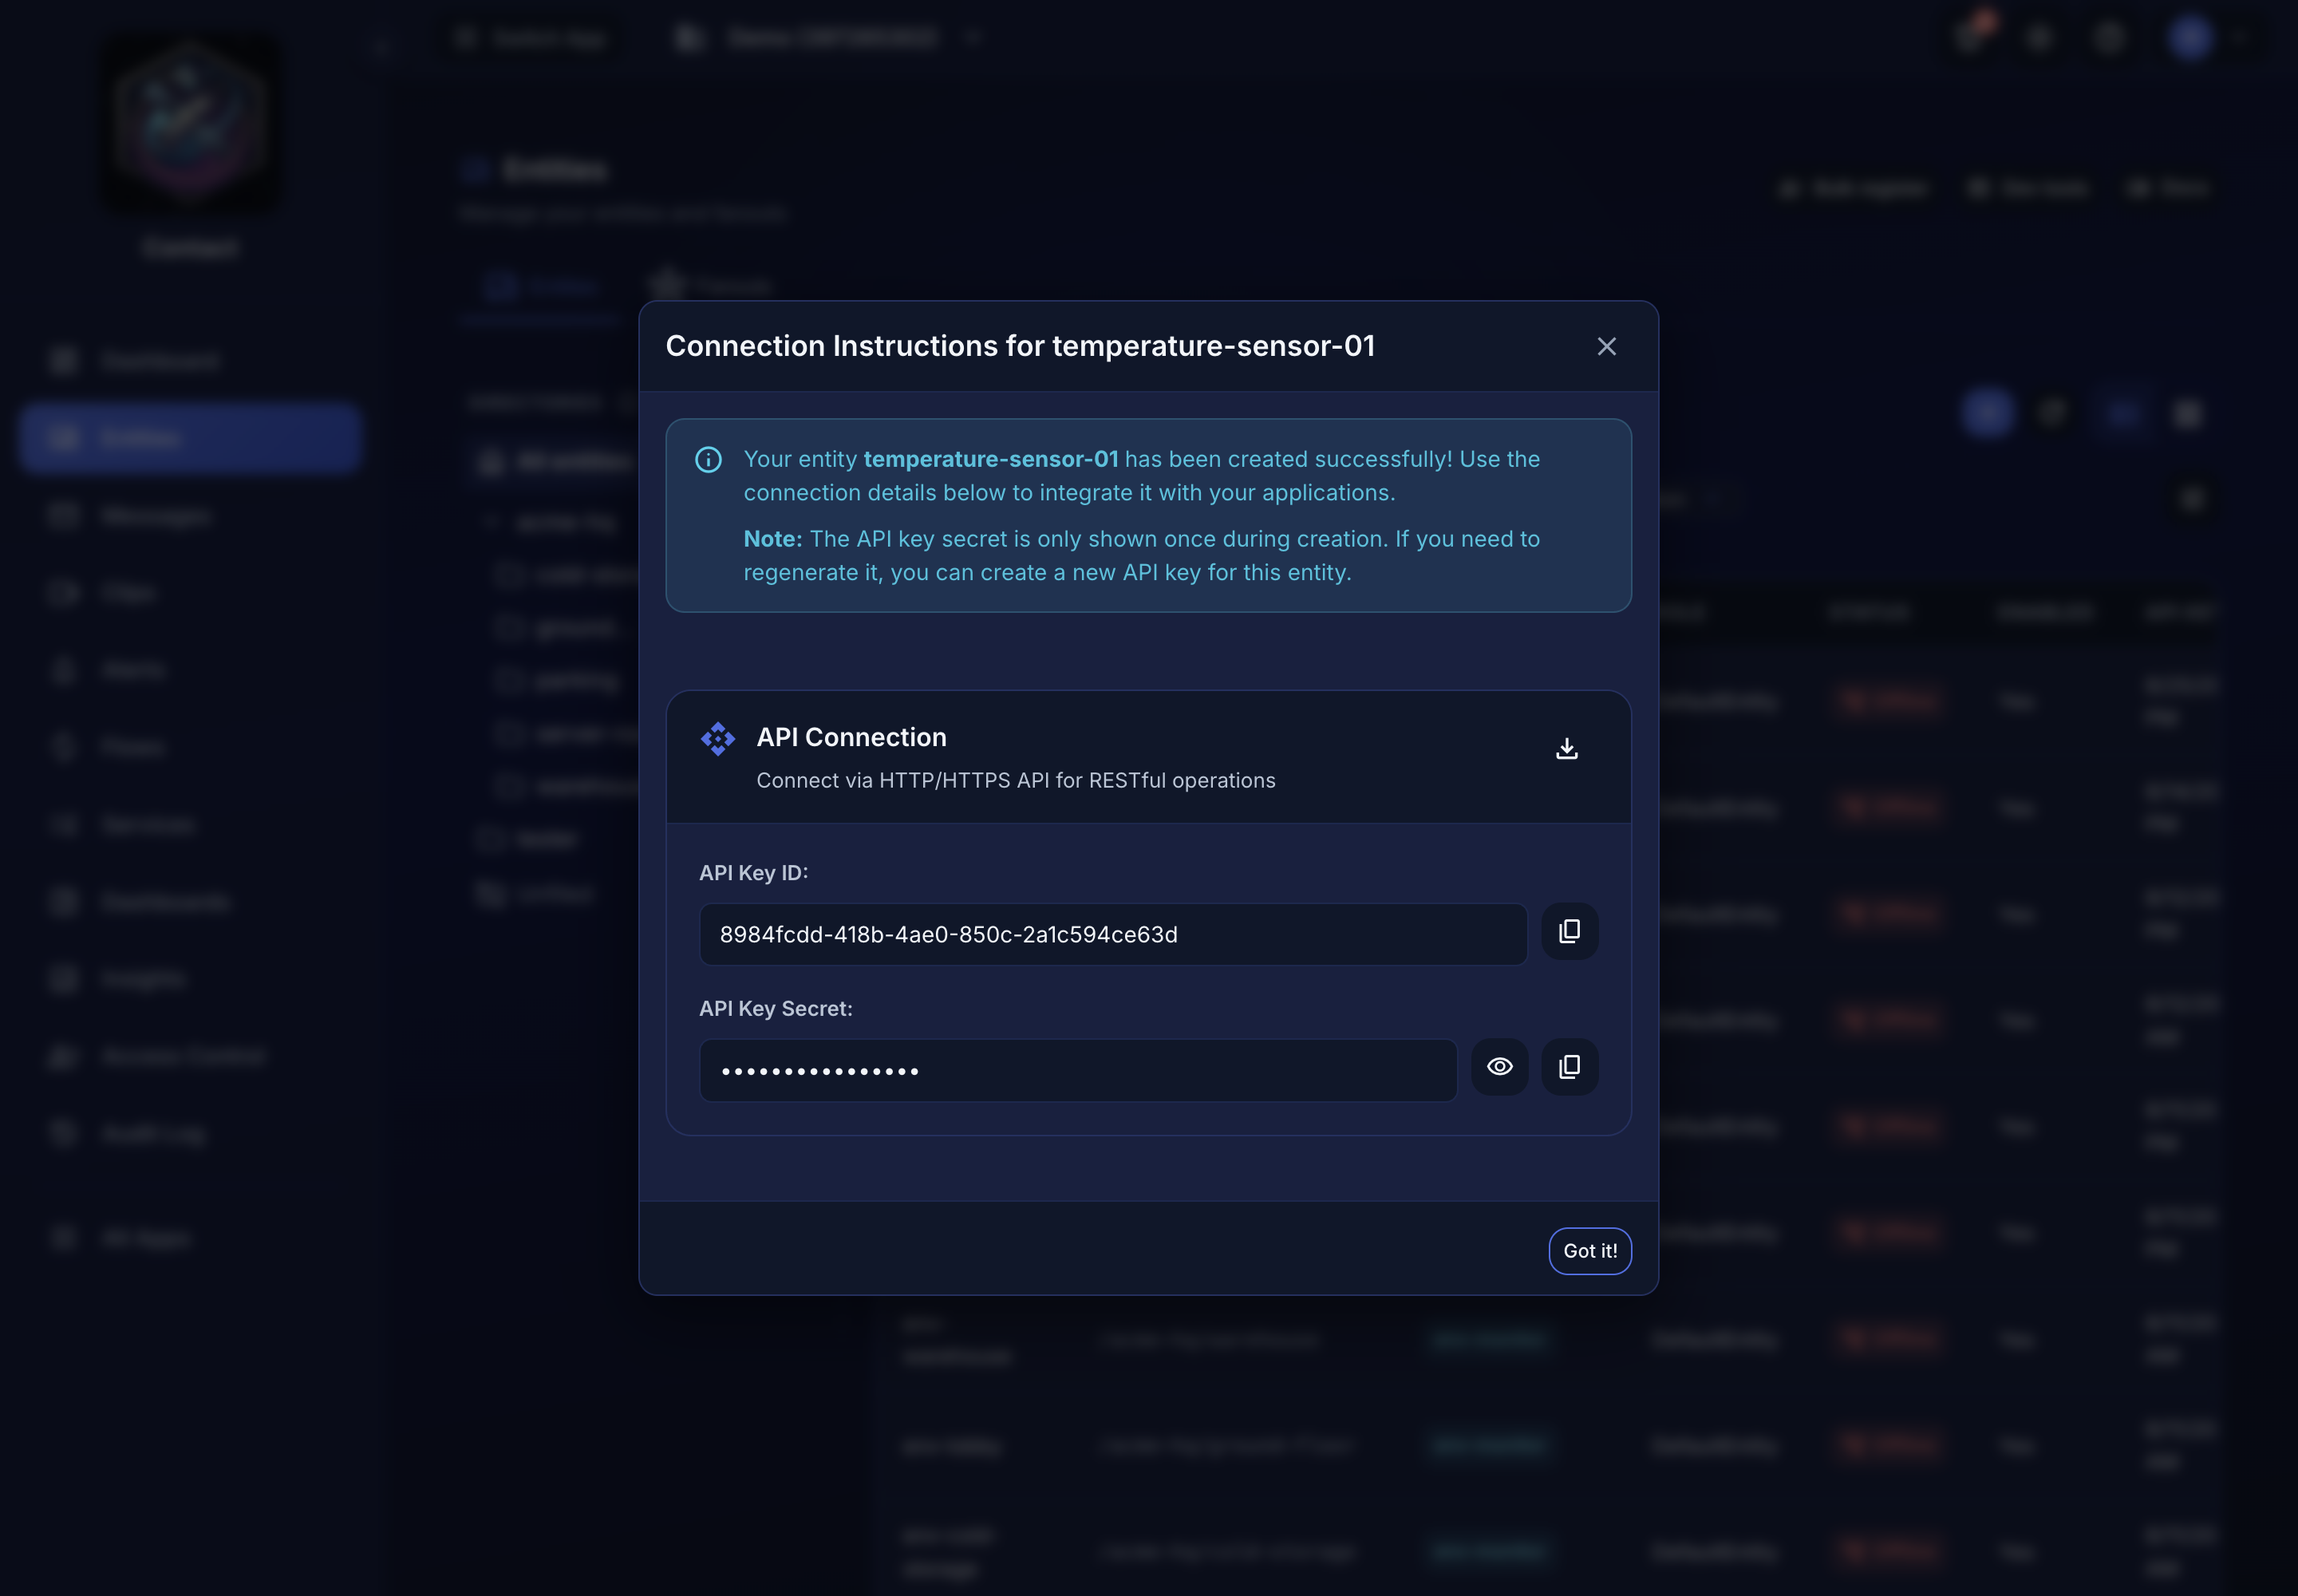 Connection Instructions, shown once when the entity is created.
The secret is shown once. Store it safely. If you lose it, rotate the entity's key from Access Control → API Keys.
Step 3: Send Your First Message#
curl -X POST https://app.tendrl.com/api/entities/message \
  -H "Content-Type: application/json" \
  -H "Authorization: Bearer YOUR_API_KEY" \
  -d '{
    "msg_type": "publish",
    "data": {
      "temperature": 23.5,
      "humidity": 65
    },
    "context": {"tags": ["sensor"]}
  }'
A success returns 200 with the stored message id:
{"code": 200, "content": "01J8XR4M2K9P7QW3FDNVBZ0HYT"}
msg_type is required (publish, heartbeat, state_new, or state_update). context.tags is what routes the message to connectors and Strand workflows.
Step 4: View Messages#
- Navigate to Messages in the sidebar
- You should see your message in the list
- Click on a message to view its details
If it didn't work#
Match the reason in the response body against this table before anything else — the status code alone doesn't distinguish a wrong key from a wrong kind of key.
| Status | reason |
What it means |
|---|---|---|
| 401 | Access Denied |
The key is wrong or revoked. The Bearer prefix is optional; a bare token is accepted. |
| 401 | Only entities can write messages |
You used an account-level API key. Messages must be sent with the key issued to the entity — the one under its Connection Instructions, not one from Access Control → API Keys. |
| 403 | Access Denied (in a message field, not reason) |
The entity's role lacks entity:WriteMessages. DefaultEntity has it; a custom role may not. |
| 400 | Message type is required |
msg_type is missing from the body. |
| 400 | Invalid message format |
The JSON is malformed, or data isn't an object. |
| 413 | Message size exceeds the 5KB per message limit. |
Trim the payload; the cap is per message and applies on every plan. |
| 429 | Monthly data limit exceeded |
You've hit the plan's data cap for the billing period. See Pricing. |
The most common first-run failure is the third row. Both key types are valid and both look identical, but only the entity's own key can publish on its behalf.
Next Steps#
Connecting real hardware? That's the usual next step:
- MicroPython SDK — ESP32, Pico W, and OpenMV boards
- SDKs & Clients overview — Python, Go, JavaScript, and the nano-agent
- Device troubleshooting — when a board won't connect or stops reporting
Building on the platform:
- Create a Fanout to message multiple entities at once
- Set up Message Validation to ensure data quality
- Build a Data Flow to route messages to external systems
- Add an Alert so you hear about it when a device stops reporting
