 Tendrl
Connectors Overview
Connectors enable Contact to communicate with external systems, sending and receiving data from various services. Connectors are created once and reused across multiple flows, providing centralized credential management and consistent configuration.
Available Connectors#
Protocol Connectors#
| Connector | Direction | Description |
|---|---|---|
| HTTP | Read / Write | REST APIs, webhooks, and HTTP-based services |
| MQTT | Write | MQTT brokers for pub/sub messaging |
Cloud Connectors#
All cloud connectors are created as a single connector type (cloud) and distinguished by a provider (aws, azure, gcp) and a service. See The cloud connector envelope below.
| Connector | Provider / Service | Direction |
|---|---|---|
| AWS S3 | aws / s3 |
Write |
| AWS SQS | aws / sqs |
Write |
| AWS SNS | aws / sns |
Write |
| AWS EventBridge | aws / eventbridge |
Write |
| AWS Lambda | aws / lambda |
Read / Write |
| Azure Blob Storage | azure / storage |
Write |
| Azure Service Bus | azure / servicebus |
Write |
| Azure Event Grid | azure / eventgrid |
Write |
| Azure Storage Queue | azure / queue |
Write |
| GCP Pub/Sub | gcp / pubsub |
Write |
| GCP Cloud Storage | gcp / storage |
Write |
| GCP Firestore | gcp / firestore |
Write |
| GCP Firebase | gcp / firebase |
Write |
Creating a Connector#
- Navigate to Flows in the sidebar, then open the Connectors tab
- Click Add Connector
- Select the connector type
- Enter a name and configure the connector settings
- Assign tags that determine which messages this connector receives
- Add any required credentials (passwords, API keys, access tokens)
- Optionally use Test to confirm the configuration works (see Test your connector)
- Click Create
Once created, the connector is active and will be included in any flow whose message tags overlap with the connector's tags.
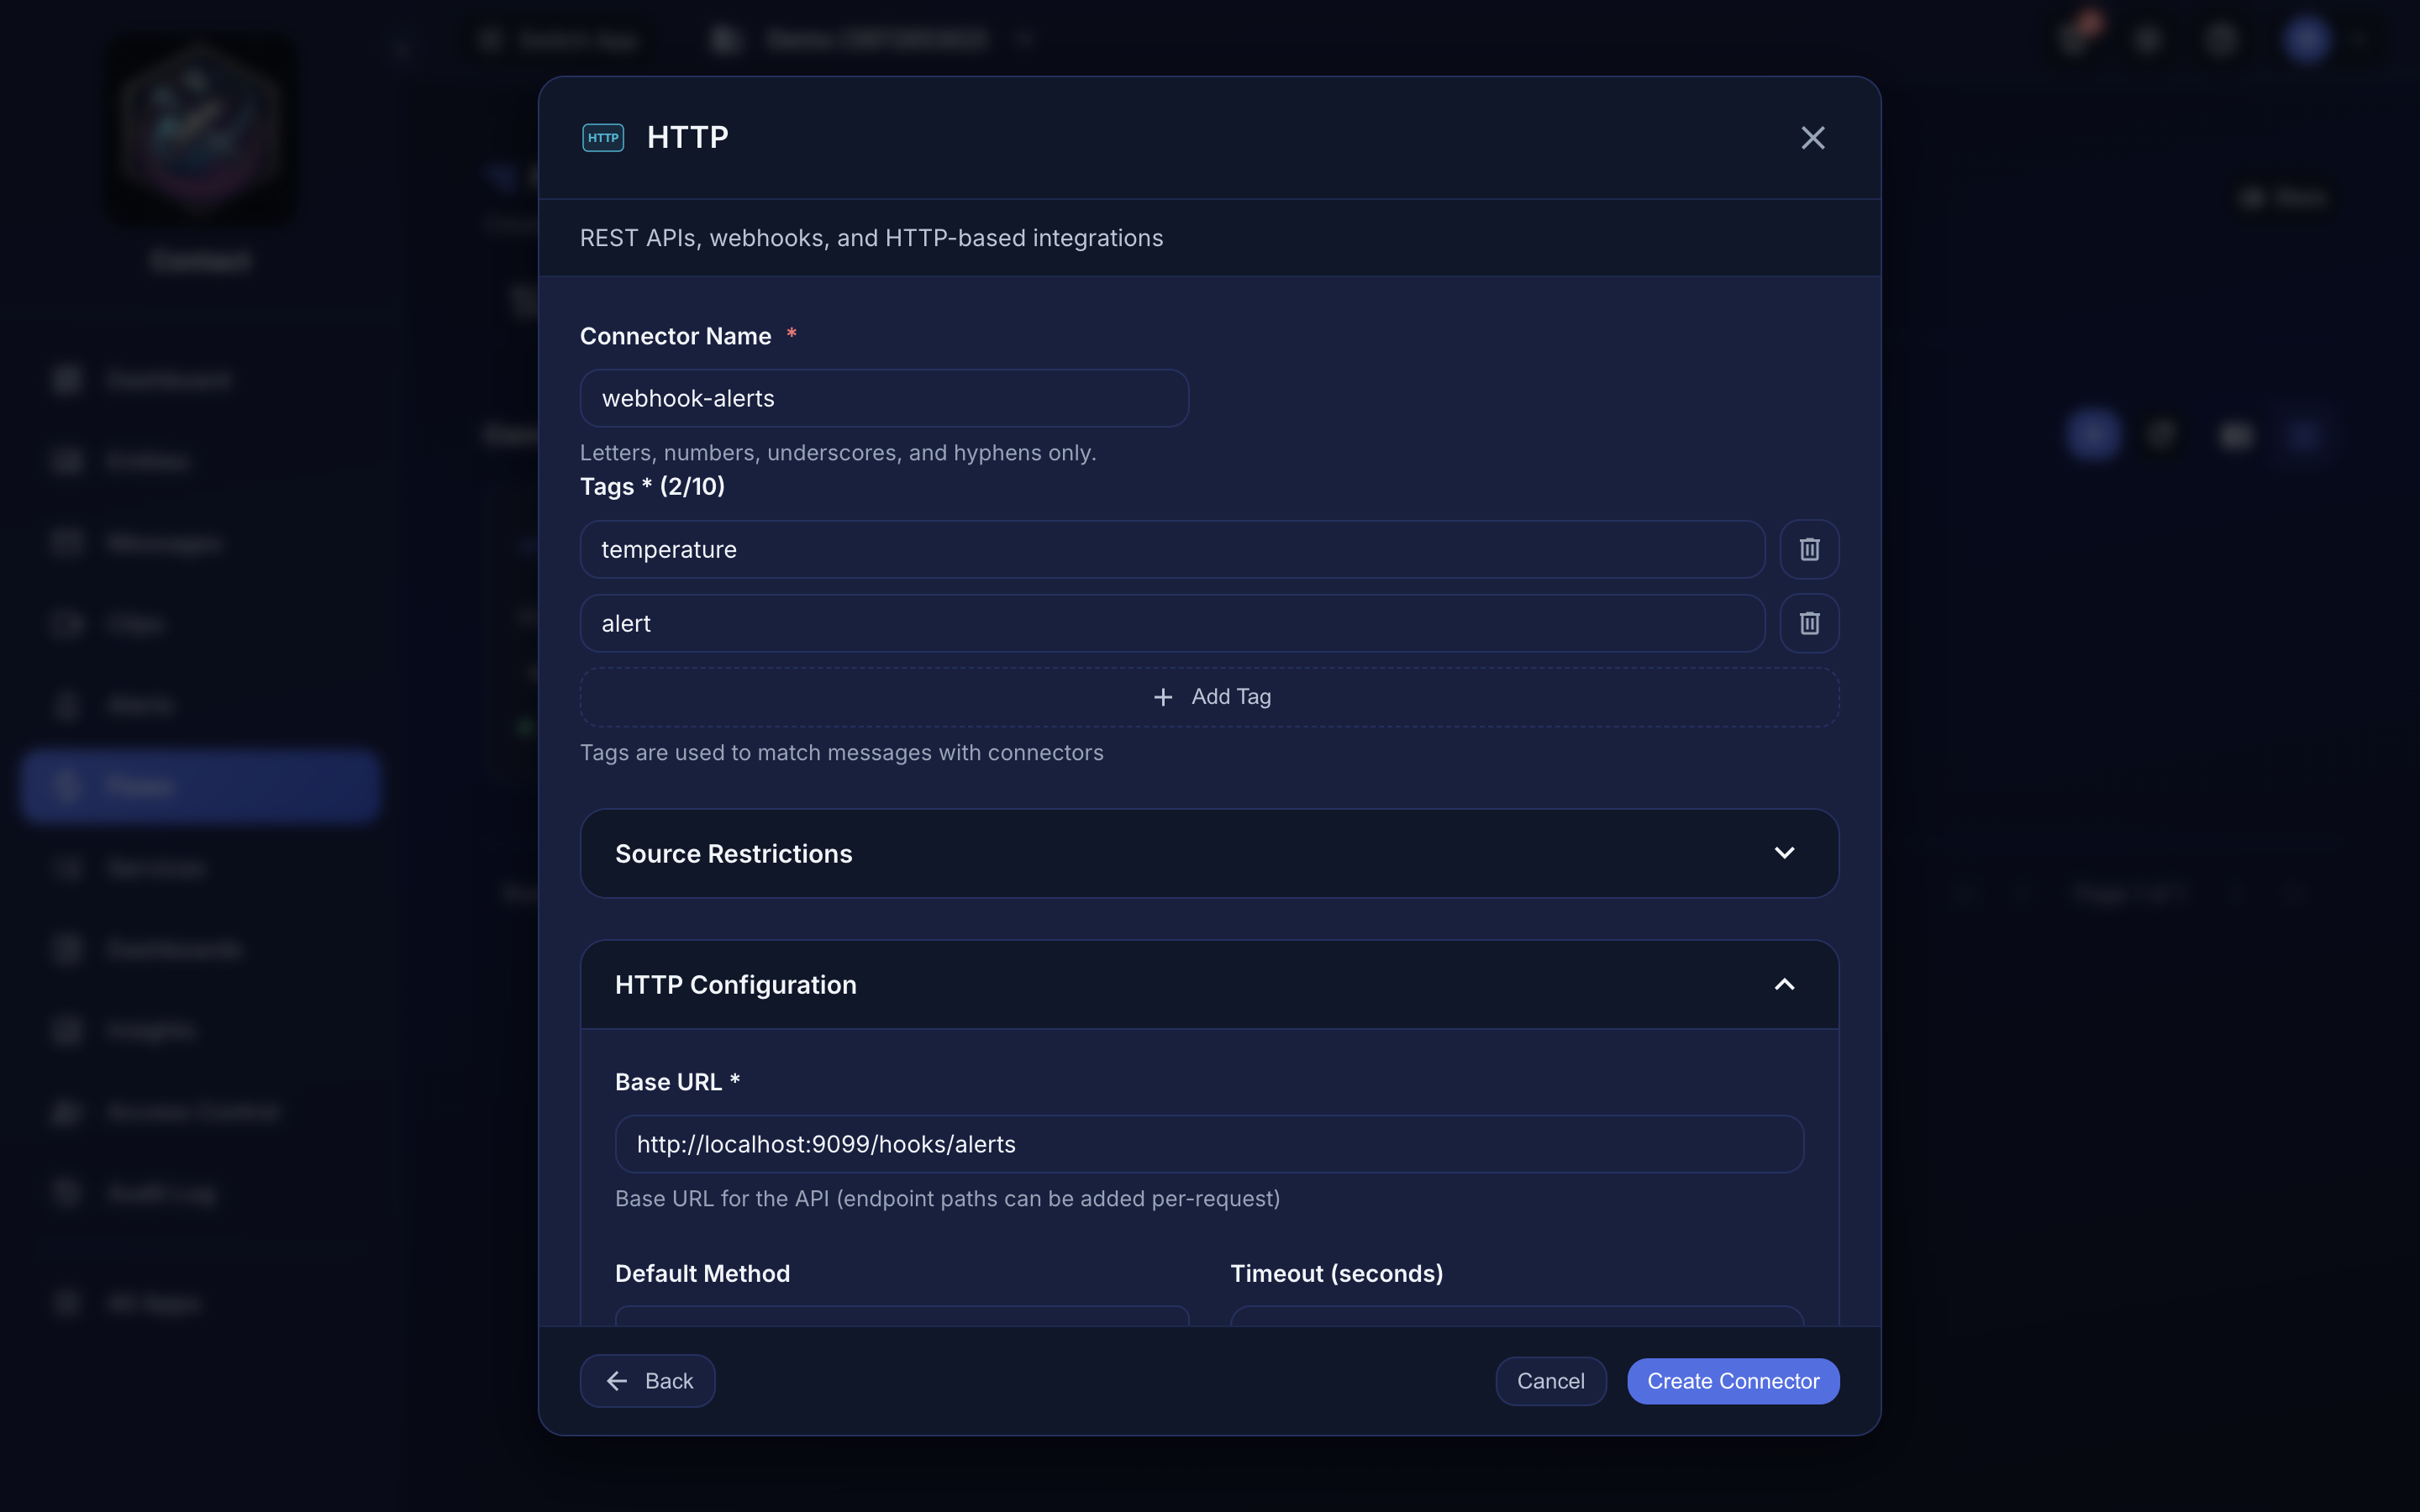 Configuring a connector and its tags in the dashboard.
How Connectors Are Used in Flows#
Connectors are not manually added to flows. Instead, Contact automatically matches connectors to messages based on tags:
- A message arrives with tags (e.g.,
["temperature", "alert"]). - Contact finds all connectors whose tags overlap with the message tags.
- A flow is created with one step per matching connector.
- Each connector executes asynchronously.
This means a single connector can participate in many different flows, depending on the tags attached to incoming messages. See How Flows Are Created for details.
Connector Configuration#
Each connector has a config object whose structure depends on the connector type. There are exactly three connector types: http, mqtt, and cloud. The type field determines the connector's behavior.
Sensitive fields in connector configuration (passwords, API keys, tokens) are encrypted at rest and decrypted only at execution time.
The cloud connector envelope#
There is no aws.s3 or gcp.firestore connector type. Every AWS, Azure, and GCP connector is created as type: "cloud" and identified by two more fields inside config:
| Field | Values | Description |
|---|---|---|
provider |
aws, azure, gcp |
Which cloud provider |
service_type |
e.g. s3, sqs, sns, eventbridge, lambda, storage, servicebus, eventgrid, queue, pubsub, firestore, firebase |
Which service within that provider |
The remaining fields in config are service-specific (bucket name, queue URL, credentials, etc.) and are listed on each cloud connector's page.
Create cloud connectors through the Connectors UI, which presents the correct fields for the chosen provider and service and submits them in the right format. The exact field names accepted by the raw create API are being standardized, so the JSON examples on the cloud connector pages are best treated as a reference for which values you'll supply rather than an exact request body. The UI is the reliable path today.
Where tags and allowedSources go#
Both tags and allowedSources live inside the config object, alongside the type-specific fields:
{
  "name": "my-connector",
  "config": {
    "type": "cloud",
    "provider": "aws",
    "service_type": "s3",
    "tags": ["temperature", "alert"],
    "allowedSources": ["sensor-*"]
  }
}
tagsdetermine which messages this connector receives. A connector runs whenever an incoming message's tags overlap with the connector's tags.allowedSourcesis an optional allow-list of entity names that may trigger this connector. Each pattern is matched against the entity name of the message sender using glob wildcards (*,?). If a triggering entity does not match any pattern, the connector is silently skipped for that message. WhenallowedSourcesis empty or omitted, all entities are allowed.
Before relying on a connector in a flow, use the Test action (also available via POST /api/flows/connectors/test). For HTTP and MQTT this validates the URL/broker format. For cloud connectors it attempts a real, credentialed connection to the provider, so a successful test confirms your credentials and resource identifiers are correct. A failed test returns the reason (e.g. invalid credentials, missing required field).
Connector Output#
Every connector records a standardized step result on the flow with this shape:
{
  "status": "completed",
  "data": { },
  "statusCode": 200,
  "error": ""
}
| Field | Description |
|---|---|
status |
completed on success, error on failure |
data |
The connector's service-specific response (e.g. for AWS S3, the bucket and object path). Contents vary by provider and service. |
statusCode |
Numeric status code where applicable (e.g. HTTP and AWS results); omitted otherwise |
error |
Error message when the step failed; omitted on success |
Step results are visible in the flow detail view. The exact contents of data for each service are shown on the individual connector pages.
Next Steps#
- HTTP Connector: REST APIs and webhooks
- MQTT Connector: MQTT broker messaging
- AWS S3: Object storage
- AWS SQS: Message queues
- GCP Pub/Sub: Event streaming
